First published in Flight Levels Online, Winter 2014 issue

This is another in our continuing series of Twin Commander care and maintenance tips provided by highly experienced technicians at Twin Commander factory authorized service centers. Our thanks to Steven Reid and Russ Hampton of Legacy Aviation Services for providing their insights on detecting and correcting pressurization leaks.
All pressurized aircraft develop small cabin leaks that are mostly inconsequential. It is the larger leaks that prevent the pressurization system from reaching max differential to provide crew and passengers with the lowest possible cabin altitude.
Shops typically depend on the pilot to report consistently low cabin pressure differential, and request a formal pressurization check. Or, technicians may suspect that a significant leak exists when an engine ground run following a maintenance or inspection event produces less-than-expected pressurization differential.
Once a pressurization problem has been identified, technicians will troubleshoot to pinpoint the source, or sources, of the leak. Two consistent problem areas are the bases of the rudder pedals and flight control pedestals, and the wing roots. Fixing leaks at the rudder pedals/flight control pedestals is relatively easy. Twin Commander has developed Custom Kit 50/1/2/3 featuring new rubber boots for rudder pedals and flight control pedestals that do a much better job of sealing the bases and preserving pressurization.
The wing root area is subject to flexing due to flight loads and landing forces, and the original factory installed rubber baffle seals deteriorate over time. Treating the area involves removing the old baffling and what typically is a large amount of flexible sealant that has been applied over the years to treat leaks. The contemporary method of sealing the wing root area is to use three layers of fiberglass mat laminated with flexible sealant.
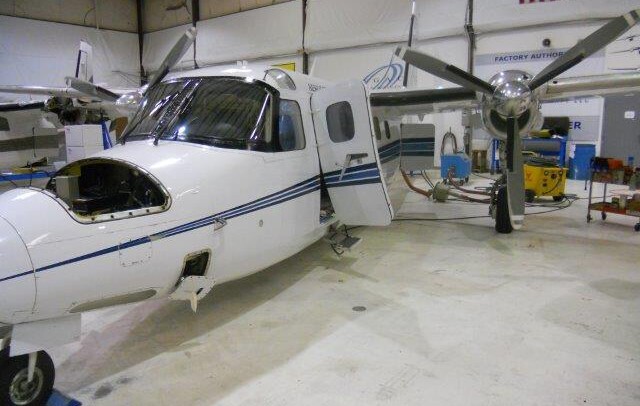
A formal cabin pressurization check is done in a hangar using a pressurization cart attached to the air cycle machine in the tail section. Regulated air to inflate the door seal is connected to the cabin door pressure line in the baggage compartment area. With the cabin controller outflow port disconnected, an adjustable orifice is installed to control the pressurization rate. The airframe is now ready to pressurize.
With technicians stationed inside and outside the cabin, the Door Lock switch is activated and the checks and tests begin. The cabin is pressurized while technicians feel and listen for leaks.
From within the cabin, lighting an incense stick is a great way to track the hard-to-find leaks. Just follow the smoke, as it will head for the leak. Technicians outside the aircraft feel about the cabin with their wrists and the backs of their hands to detect leaks.
For shop pressure cart equipment with an amperage gauge, a reading of more than 28 amps may be an indication that a turbine section of the air cycle machine should be checked. This indication is likely caused by failing, or frozen, turbine bearings, resulting in rotation restriction.
If an aircraft passes the hangar checks and tests but will not pressurize satisfactorily while in flight, other components need to be checked. Discrepancies may involve items such as the bleed air valves, the 717 valve, the cabin controller, outflow valves, or various associated components. Systems vary depending on the model.
On Fairchild-equipped models, a temp squawk during ground operations is often a result of a ground blower failure. The ground blower is not running to cool the heat exchange unit and the system goes into “full hot” mode.
Also on Fairchild-equipped models, an in-flight cabin temp squawk is often a result of failure of the lower-duct airspeed switch that controls the cabin temp.
A suggestion for owners and operators: Perform checks of the ground blower using the hidden “under the panel” maintenance switch. This switch is always left in the “On” position. If an amperage drop indication in the overhead panel occurs when the switch is turned to “Off” in flight, this suggests that the ground blower is running during flight. This is likely the result of failure of the upper-duct airspeed switch (actuated @ 140 KIAS). Damage to the brushes and commutator are likely to occur. The ground blower should not activate over 140 KIAS if the upper-duct airspeed switch is functioning properly.
The hidden maintenance switch may be left in the “Off” position in flight in a failed airspeed switch scenario; just be sure to put it back in the “On” position once under 140 knots. Also, having a ground blower light installed in the panel is not a bad idea.
